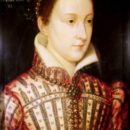
Mary, Queen of Scots: Life Story
Chapter 19 : Deposition
The Lords assured the queen that if she abandoned Bothwell, they would accept her authority, and support her as queen. Mary utterly refused, pointing out that many of those self-same lords had signed the Ainslie Bond. Perhaps she felt that no-one could be trusted, with the exception or Bothwell, who may have kidnapped and raped her, but never disobeyed her as queen. She may have believed that defeating them in armed confrontation would resolve the position, and leave her more fully in control.
Whatever her motivation, the sides confronted each other at Carberry Hill. Neither side was eager for battle, and during the day whilst the armies stood to, there was much parleying back and forth, including an offer of single combat by Bothwell. The royal troops were numerically inferior, but Mary rejected Bothwell’s suggestion that they retire to Dunbar. Always a woman of action, she ended the stalemate by agreeing to stand her army down and go with the Confederate Lords, on condition of a safe-conduct for Bothwell to leave. He agreed, on the basis that the queen was to be treated with honour.
Immediately, Mary’s mistake became obvious. Far from being treated with respect, she was taken through the streets of Edinburgh to shouts of ‘murderess’ and ‘whore’. She was then carried off to Lochleven castle, home of Lady Margaret Douglas née Erskine, mother of her half-brother, Moray, and also of Sir William Douglas, Morton’s cousin.
Ruthven and Lindsay remained to guard the queen, whilst, back in Edinburgh the lords took possession of her personal belongings. Not everyone was content with this treatment of the queen. The Duke of Châtelherault, indecisive as ever, and the rest of the Hamiltons, talked of rescue, but failed to achieve anything. The Lords vigorously pursued the underlings involved in the murder of King Henry, to prevent any suspicion falling on the senior men involved. They did not, at this time, suggest that Mary had been involved.
Whilst at Lochleven, Mary still refused to divorce Bothwell – presumably to preserve the legitimacy of the child she now knew herself to be carrying. She was harshly treated in Lochleven, and Elizabeth’s ambassador, who was not permitted to see her, was appalled at the situation. He maintained that only his intervention, and the indication that Elizabeth would take Mary’s death very badly, prevented the lords from dispatching her. This harsh treatment no doubt contributed to the miscarriage of twins that Mary suffered in July. Whilst she was lying in her sickbed, severely weakened by loss of blood, she was bullied and threatened by Lindsay into signing articles of abdication. Subsequently, Mary maintained that as the abdication had been effected under duress, it was not valid.
The lords immediately moved to have the year-old James crowned. Moray returned from France to act as regent, rejecting Mary’s pleas for help, and treating her to a sermon on her wickedness.
In June 1567, one of Bothwell’s men was captured and handed over a casket of papers. No reference to their contents was made during the summer, but in December, the lords hinted that the papers included private letters from Mary to Bothwell which implicated the queen in her husband’s murder. These revelations were to stiffen the sinews of those who might think twice about the forthcoming parliamentary confirmation of Mary’s abdication, and Moray’s regency.
There was still unease about the deposition of the queen, and the political landscape made a sudden shift in May 1568 when Mary, recovered from her miscarriage and the depression and melancholy that had afflicted her more or less since the birth of James, managed to escape from Lochleven, by charming younger members of the family into aiding her.
Once at large, Mary found plenty of support – much of it from men who had previously rebelled against her, including Argyll. Whilst they might try to contain a monarch who did not act as they wished, deposition was a step too far. It was not the queen’s intention to give battle, but to move to the stronghold of Dumbarton, held for her by Lord Fleming.
En route to Dumbarton, she was confronted at Langside by Moray, as regent for King James. Despite Mary’s superior forces, she was heavily defeated. Escaping from the battlefield, she was left with three choices – go to ground in the Highlands, and recruit more men; escape to France, to gain French support for an invasion, or slip across the border into England, in the hope of support from Elizabeth.
Of all Mary’s mistakes, the choice she now made – to go to England – was the worst. Why she thought Elizabeth would support her, when the English queen had been largely antagonistic to her, and supportive of Moray and his allies since 1558, is a mystery. It cannot even have been dread of a sea-journey as Mary was a good sailor and enjoyed being on a ship. Nevertheless, she crossed the Solway Firth and landed at Workington in Cumberland at 7 o’clock in the evening of Sunday, 16th May, having already sent a message, with a valuable diamond, to London to solicit her cousin’s aid.
She was never to know another moment of freedom.
Mary, Queen of Scots
Family Tree